
Step 1: Create the Marketing Event
- Navigate to Marketing → Events.
- Click Create event and fill in the corresponding properties (name, description, organizer, start date, end date, type, etc.).
- Leave the URL Page field empty for now — you'll come back to fill it in once the event page is published (see Step 5).
Step 2: Clone the Registration Form
- Go to Marketing → Forms.
- Locate the Events New Form template.
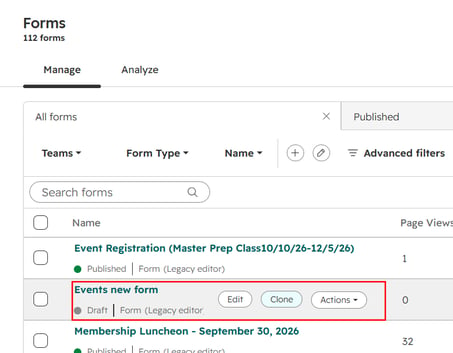
- Clone it using the Clone option.
- Rename the cloned form with a clear, event-specific name (e.g., "Event Name – Registration Form").
- No need to include a Record ID or any additional configuration at this stage — just make sure the name is correct.
Step 3: Clone the Event Page
- Go to Marketing → Website Pages (or CMS → Website Pages, depending on your navigation).
- Find the page named "New Event Page".
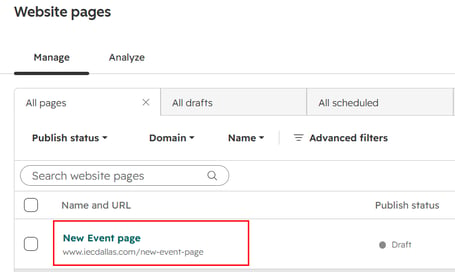
- Clone it to create the page for your new event.
Step 4: Edit the Event Page
- Open the newly cloned page.
- Update all the content elements as needed for this specific event (banner, description, agenda, images, etc.).
- Add the registration form you created in Step 2 to the page.
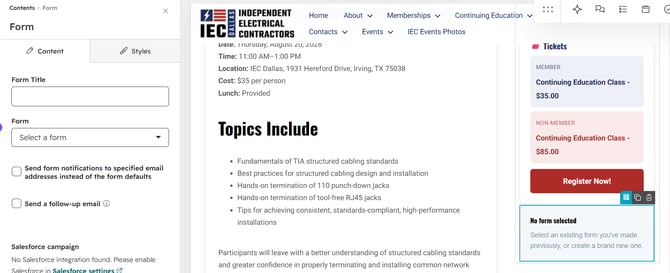
- Publish the page once everything looks correct.
Step 5: Attach the Page URL to the Event
- Go back to Marketing → Events and open the event record you created in Step 1.
- Copy the published URL of the page you just created.
- Paste it into the URL Page property on the event record.
Step 6: Clone the Automation Workflow
- Go to Automation → Workflows.
- Find the workflow named "IEC Dallas - Event (NAME) Subscription".

- Clone it and rename it to match your event.
Step 7: Update the Form Enrollment Trigger
- Open the cloned workflow.
- Locate the "Form name is any of" condition.
- Click Edit criteria and select the form you created for this specific event (from Step 2).
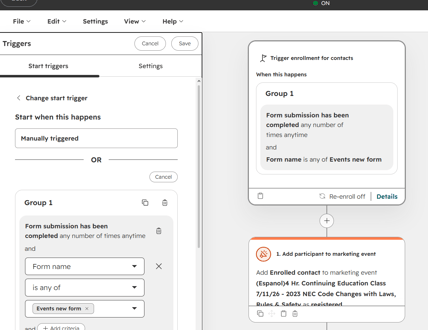
Step 8: Update the "Add Participant to Marketing Event" Action
- In the same workflow, find the "Add participant to marketing event" action.
- Select the event you created in Step 1.
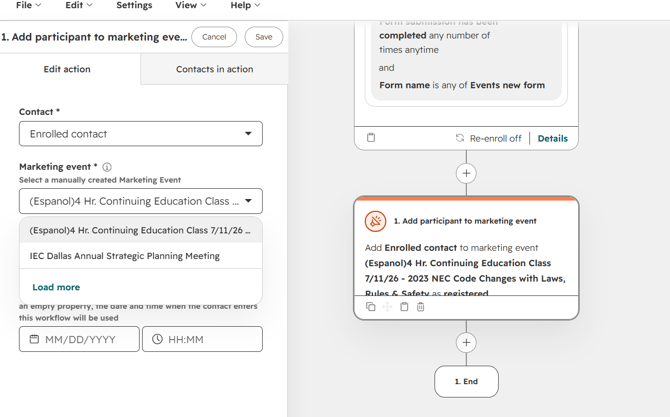
- Click Save.
Step 9: Review and Activate
- Review the entire workflow to confirm everything is correctly configured.
- Click Review and turn on to activate the workflow.